The Creative Space of My Dreams!

When we purchased our home in 2017, there was a very large side yard. I had mentioned to my husband "look, there is even room to add an addition later". I don't really think he gave it much thought, but let's just say I have been dreaming of this very craft room every since that very day.
When COVID hit, we were spending so much time at home just like everyone else, my Etsy shop was really taking off and we were just running out of space to work on my orders. We were gluing felt balls in the dining room and we haven't eaten dinner at the table since. I am very much the type of person that likes to adapt my spaces to be the most functional for my family but we just couldn't make it work.
The idea of the addition was re-born! We had been saving to add on to our home and this was the perfect time to do it. It was quite a long process, it took about 7 months to build the 1200 sq ft. space.

Once things really started to take shape I immediately started planning and designing my Craft room!

This is the initial design board that I came up with for my space. I knew I wanted it to be bright, fun and full of RAINBOWS!!

To achieve my rainbow dreams, I knew that I was going to need to start with the walls and floor. I partnered with Dunn Edwards Paints. As an interior designer, Dunn Edwards is always my "go to" for good quality paint. In my opinion they have the best colors available on the market and the best quality paint.
I painted all of the walls a white, Dunn Edwards Whisper DEW340 is my favorite white. It isn't too yellow and it isn't too blue, it us just the perfect white. I then selected all the rainbow colors I needed to make the beautiful wall mural that I had planned.
I decided to use Dunn Edwards' exterior Eversheild paint because I knew I was going to be using on the floors as well and I wanted the most durable paint possible. This isn't intended as a floor paint but knew it would hold up well on the floor once I sealed it with a polyurethane.


Pinks: DE5070 Nosegay, DE 5071 Baby Girl, DE 5072 Bubblegum
Peaches: DE 5127 Rose Frost, DE5128 Peachy Keen, DE 5129 Peachtree
Yellow: DE 5337 Lit, DE 5338 Twinkling Lights, DE 5339 Firefly Glow
Mints: DE 5679 Mint Condition, DE 5729 Spearmint, DE 5730 Island Oasis
Blues: DE 5680 Shallow End, DE 5681 Pale Jade, DE 5728 Tinted Ice
Lilacs:DE 5980 Sheer Lavender, DE 5981 First Lilac, DE 5982 Plum Point

I always like to have a plan before starting a project like this. I drew up where I wanted my arches to be on the wall and how far apart they would be spaced. I made some templates for my arches and drew them on the wall in place where I planned for them to go.
*Pro Tip: use a colored pencil to make your marks on the wall. Try to use a color close to the color you are painting, then the lines will be less visible after painting over them.
Once my arches were drawn in, I took my laser level and taped the lines down from the bottom of the arches. By using the laser level, there were less lines to make on the wall and less lines to cover with paint.

This is one of those things, it takes so much time, especially because I decided to do all 4 walls but I knew it would be totally worth it in the end!
Once I was done taping I was ready to paint. I painted my lines in rainbow order and had them meet at the top of the arches. I hand painted the arches, it was just easier then taping them all off. I had my colored pencil lines to guide me.

When we built our addition I specified smooth walls for my interior. I knew I was going to be doing a lot of paint and wallpaper and smooth walls are just a little cleaner looking to me. Because my walls were smooth, I easily got a clean paint line from just the tape. I didn't need to caulk or paint over the lines with the base wall color first so that made it a bit easier.

I decided to continue the lines from two walls down on to the floor in a staggered pattern. I purchased an unfinished white Oak engineered wood flooring online from a manufacturer that had some closeout flooring that only had small amounts left. I only needed 165 sq. ft. so this was perfect for my project. After we installed the flooring and painted all the walls we started painting the floor. We used the same Dunn Edwards Whisper color for the floor that we used for the walls.

I have to admit, it felt a little strange painting the floor but it was something I have always wanted to do so I just went for it!! Guess what?? I LOVE it so much!!

We finished the floor with about 3 coats of polyurethane for a super durable finish. It has only been a couple of weeks so far but it is holding up great! There are some more fun things to share on this space but you'll have to check back, I have some more fun stuff up my sleeve!
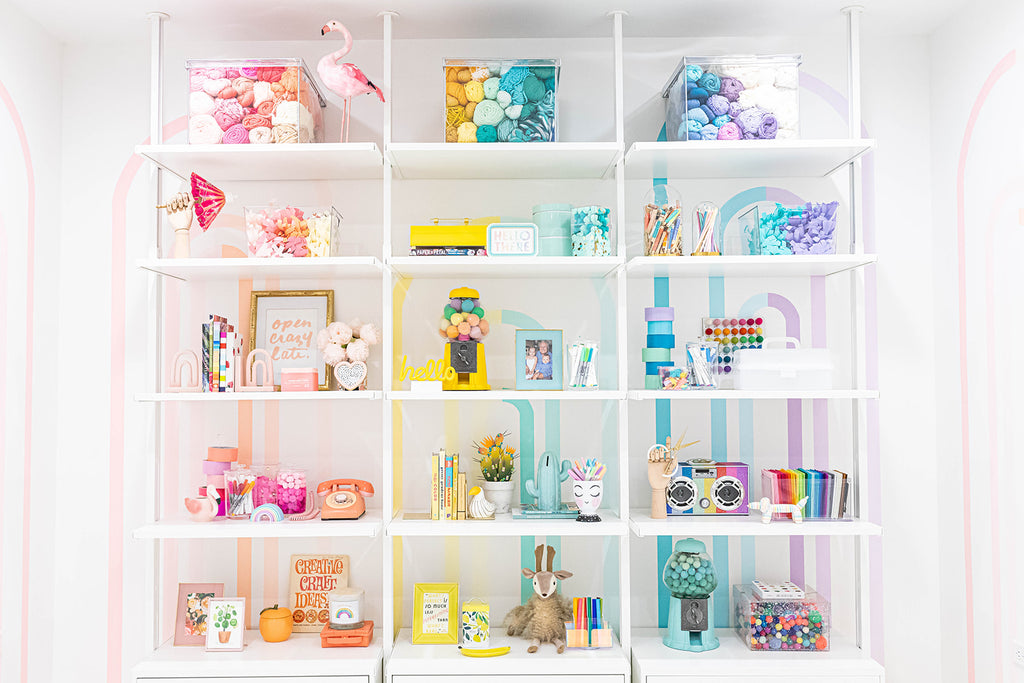
But for now, I am going to leave you with this, my styled shelves on my custom painted mural that almost anyone could do with a little time and patience!

XO,


Comments on this post (0)